How to Edit Labels and Columns in Purchase Orders in Sleek Bill
A Purchase Order (PO) is an important document used to communicate purchasing requirements to vendors. Different businesses often require customized purchase order formats based on their industry, products, or internal processes. To help businesses create more personalized and professional purchase orders, Sleek Bill allows you to easily edit labels and manage the columns displayed in your Purchase Orders.
In this guide, we'll show you how to customize labels and columns in your Purchase Orders using Sleek Bill.
Why Customize Purchase Order Labels and Columns?
Customizing your Purchase Order format helps you:
- Match your business terminology and workflow
- Display only the information relevant to your vendors
- Improve document clarity and professionalism
- Reduce confusion during procurement and order processing
- Create industry-specific purchase order formats
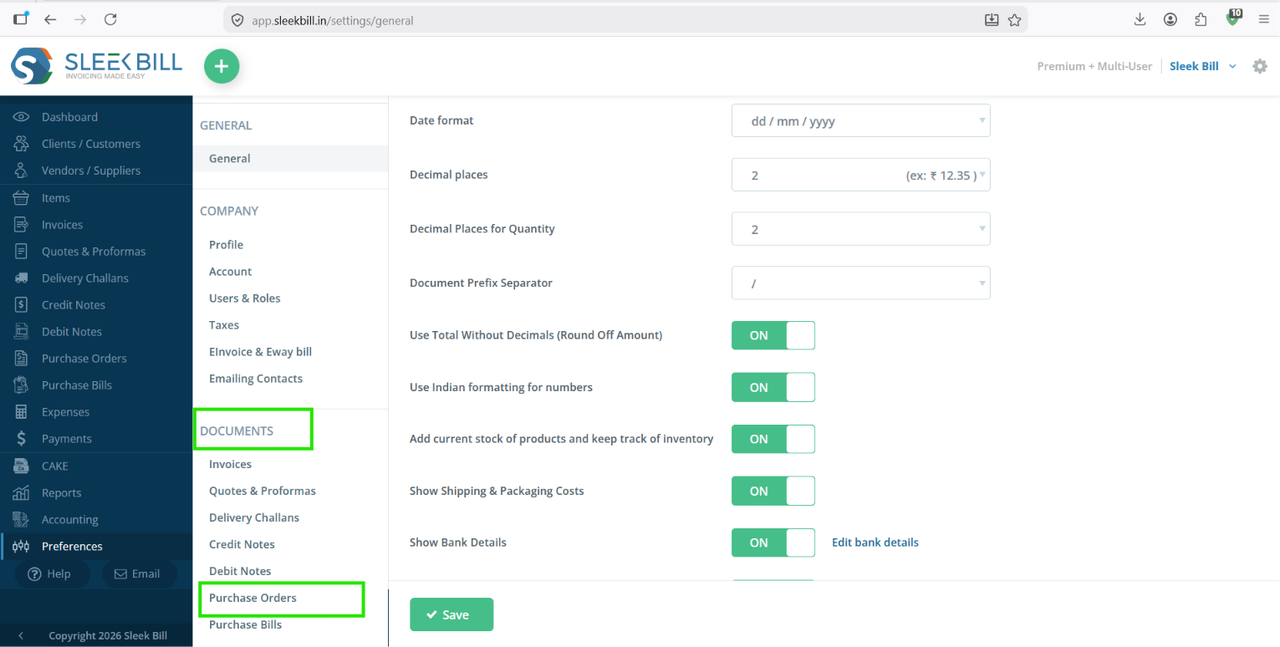
Steps to Edit Labels and Columns in Purchase Orders

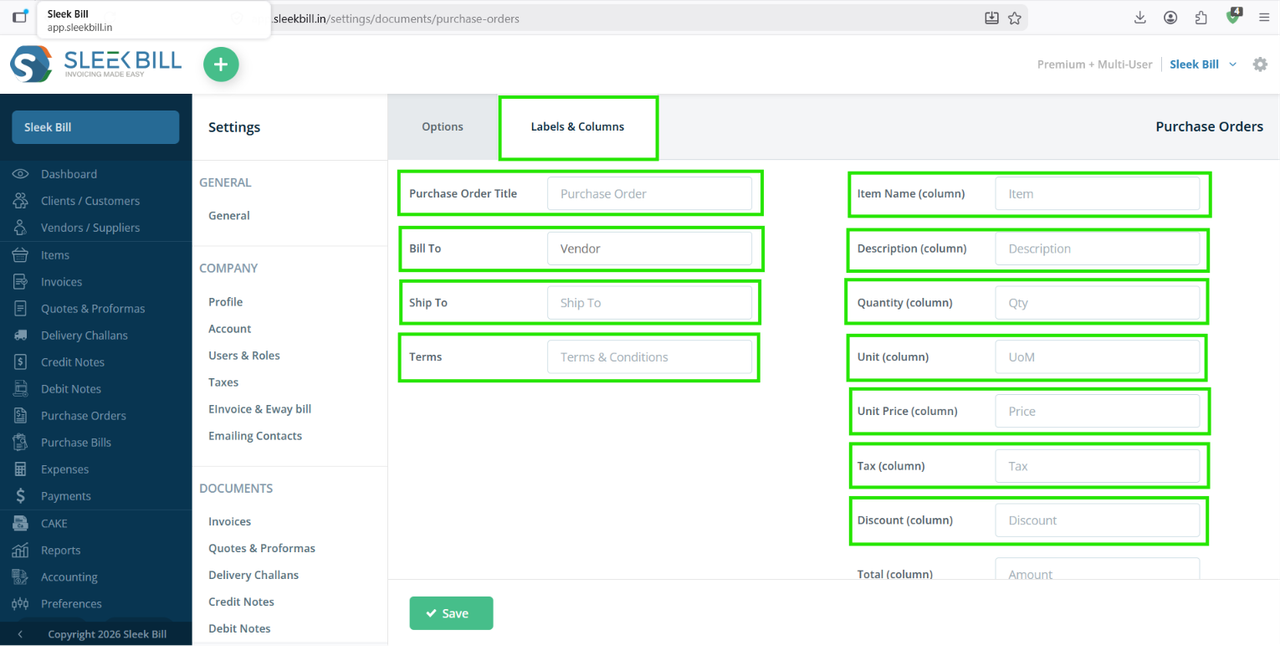
Purchase Order Title: Here you can change the purchase order title to: Purchase Order.
Bill To: You can change the “Bill To” label to any of the following: Offer To, Sold To, Billing Address, Consignee Details, Vendor Details, Client Details, Recipient Details, Party Details, etc.
Ship To: You can change the label to: Shipping Address, Delivery Address, Deliver To, Dispatch To, Delivery Information, Shipping Details, Delivery Location, etc.
Terms: You can change Terms & Conditions labels to: Policy, Commercial Terms, Agreement Terms, Trade Terms, Billing Terms, Delivery Terms, Warranty Terms, Important Notes & Terms, etc.
Item Name (Column): You can change Item Name to: Product, Goods, etc.
Description (Column): You can change Description labels to: Product Details, Product Specification, Item Details, Goods Description, Service, Description, Particulars, Product Information, etc.
Quantity (Column): You can change Quantity labels to: QTY, Item Quantity, Product Quantity, Ordered Qty, Order Quantity, Supplied Quantity
Delivered Quantity, etc.
Units: You can change Unit labels to: Unit Type, Measurement Unit, UOM (Unit of Measurement), Qty Unit, Item Unit, Product Unit, etc.
Unit Price (Column): You can change labels to: Price Per Unit, Rate, Item Rate, Unit Rate, Selling Price, Cost Per Unit, Per Unit Cost, etc.
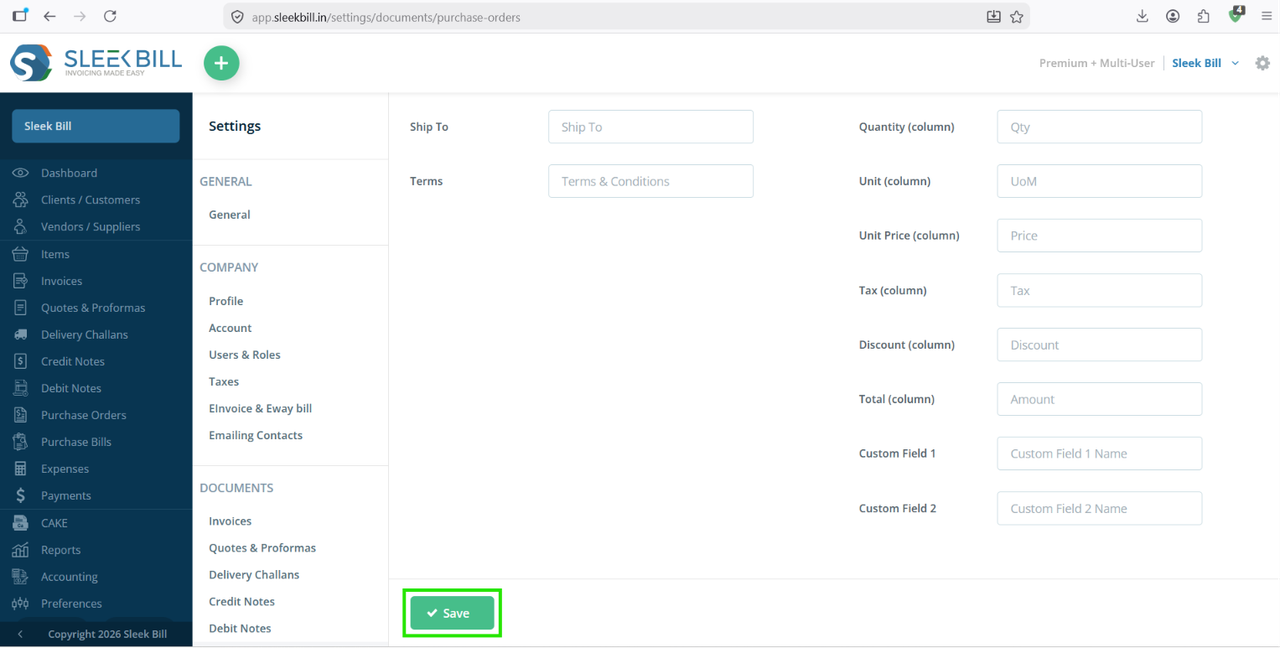
Tax (Column): You can change Tax labels to: GST, Tax (%), Tax Amount, Applicable Tax, Tax Charges.
Discount (Column): You can change the Discount labels to: Item Discount, Invoice Discount, Trade Discount, Offer Discount, Sales Discount, Purchase Discount, etc.
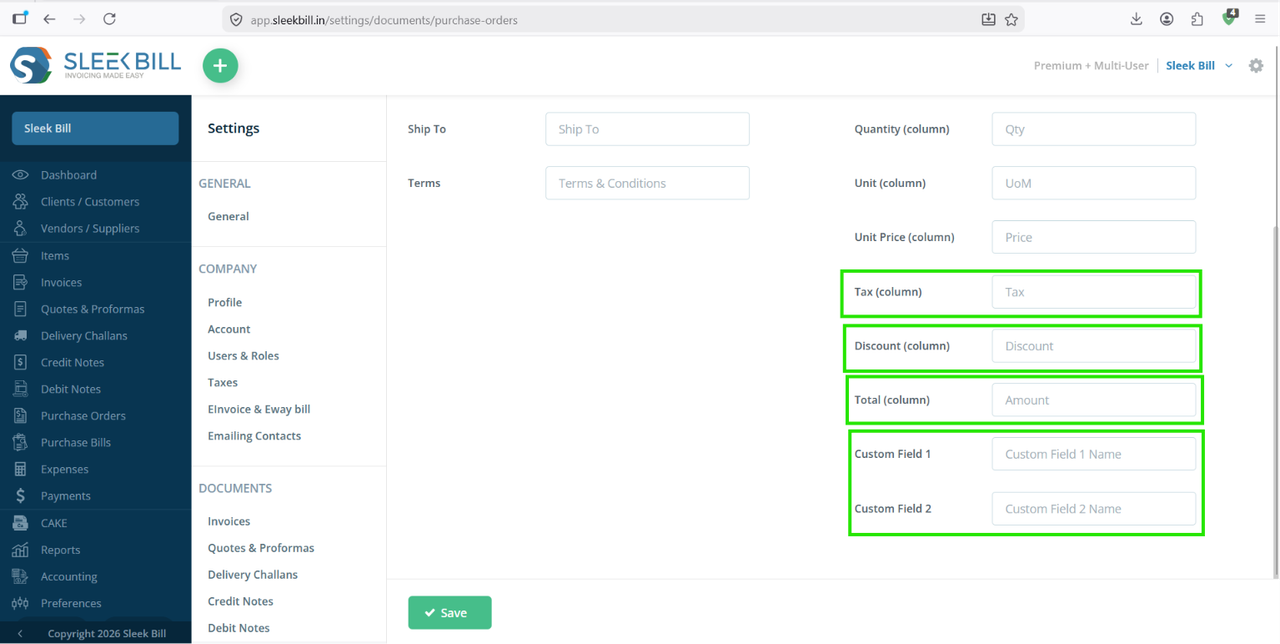
Total (Column): You can change Total labels to: Amount, Grand Total, Net Total, Final Total, Invoice Total, Total Amount, Amount Payable, Total Payable, etc.
Shipping (Column): You can change Shipping labels to: Shipping Cost, Shipping Fee, Delivery Charges, Delivery Fee, Freight Charges, Transportation Charges, Dispatch Charges, Logistics Charges, etc.
Custom Field 1 and Custom Field 2: You can customize these fields for: Contact Person, Remarks, Notes, Warranty Details, Service Period, Subscription ID, and Save the Changes, etc.
Step 7: After making all changes, click on the Save button.
Benefits of Customizing Purchase Orders in Sleek Bill
- Creates professional and business-specific purchase orders
- Improves communication with suppliers
- Enhances document readability
- Supports different business processes and industries
- Saves time by displaying only relevant information
Conclusion
Sleek Bill provides flexible customization options that allow businesses to tailor Purchase Orders according to their operational needs. By editing labels and managing columns, you can create clear, organized, and professional purchase orders that improve purchasing efficiency and vendor communication.
Start customizing your Purchase Orders today and make your procurement process more streamlined with Sleek Bill.
Was this article helpful?